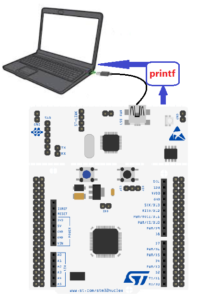
This example show the way to implement the printf on STM32 NUCLEO board for send data via USB to the PC.
ATTENTION: Now there is a new version that use STM32CubeIDE that is here.
Pre Requirements:
- Install CUBE-MX
- Install ATOLLIC (TrueSTUDIO PRO) that for STM32 is free
- Install the tools for use STM32, see here.
I suggest to use on the PC a terminal emulator like TeraTerm, configured has show below.

It’s possible use the USB connector present on the STM32 NUCLEO board for send data from NUCLEO to the PC thanks to the functionalities of the ST-LINK-v2 present on the NUCLEO boards.
If you look the schematics of the STM32 NUCLEO boards you see that the USART2 of the STM32xxx present on your NUCLEO board, is connect to the STM32F103CBT6 that implement the ST-LINK-v2 functionalities.
So for implement the printf via USB port is necessary configure the USART2 and redirect the PUTCHAR to USART.
ATTENTION:
Use CUBE-MX to configure your USART2 on the NUCLEO board.
For use the printf is necessary insert the C code show below.
Insert from:
/* USER CODE BEGIN 4 */
and
/* USER CODE END 4 */
the code below.
int __io_putchar(int ch)
{
 uint8_t c[1];
 c[0] = ch & 0x00FF;
 HAL_UART_Transmit(&huart2, &*c, 1, 10);
 return ch;
}

int _write(int file,char *ptr, int len)
{
 int DataIdx;
 for(DataIdx= 0; DataIdx< len; DataIdx++)
 {
 __io_putchar(*ptr++);
 }
return len;
}
ATTENTION
From the above code, the sw refer to huart2 that is the handler of the USART2 that is connected to ST-LINK emulator for exit like a virtual com.
Normally on the 64pin NUCLEO is used the USART2 (huart2) but on 144pin NUCLEO the USART is USART3 so the handler to use is huart3.
Also are necessary some extra line of code for test the application.
Insert from:
/* USER CODE BEGIN Includes */
and
/* USER CODE END Includes */
the code below.
#include <stdio.h>
/* USER CODE BEGIN PV */
/* Private variables ———————————————————*/
and
/* USER CODE END PV */
the code below.
int nLoop=0;
Insert from:
/* USER CODE BEGIN 3 */
and
/* USER CODE END 3 */
the code below.
 HAL_GPIO_TogglePin(GPIOA, GPIO_PIN_5); // PORTA, Pin PA5
 HAL_Delay(500);
 nLoop++;
 printf("nLoop == %d \n\r", nLoop);
That is all, compile and test your code.
How to get the SW for this project
Please send us an email and ask us the password for: Printf-NU091-ATOLLIC
Please specify also your country and your city, this are only for our personal statistics.
Get the SW clicking here, but remember to ask us the password for open it.
Note: the project contain also the file for CUBE-MX
Thanks to CUBE-MX is very easy transfer this example on other STM32 mcu.
